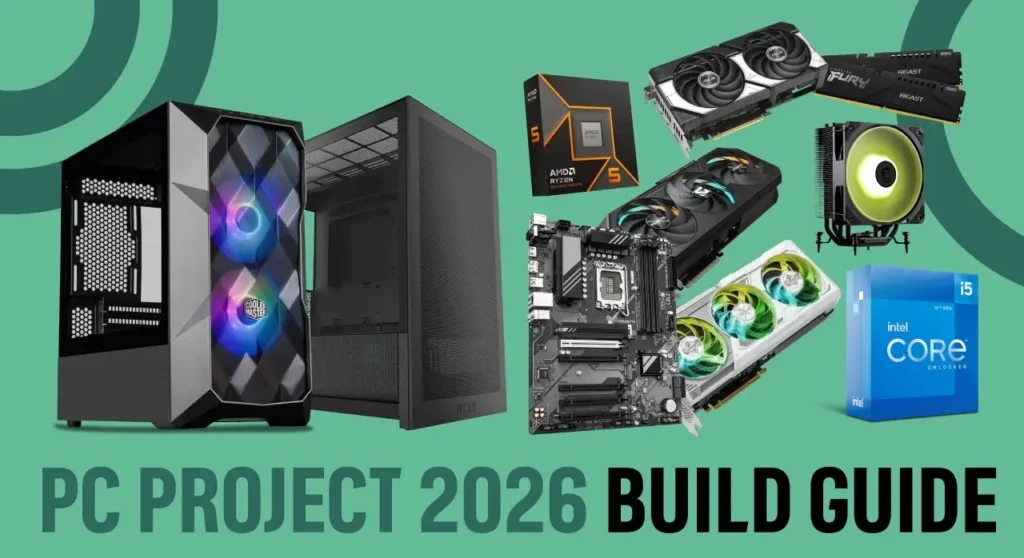

How to Build a Gaming PC on a Budget in Malaysia (2026 Guide)
Building your own gaming PC in Malaysia doesn’t have to break the bank. Whether you’re a student in Kuala Lumpur or a first-time builder in Penang, this complete guide walks you through building a capable gaming rig for as little as RM 2,000—or scaling up to RM 5,000 for maximum performance.
In this guide, you’ll learn exactly which components to buy, where to find the best prices in Malaysia, and how to assemble everything yourself step-by-step. We’ll cover three budget tiers with current 2026 pricing, so you can choose the build that fits your wallet.
Why Build Your Own PC Instead of Buying Pre-Built?
Building your own gaming PC gives you three major advantages over pre-built systems:
- Cost savings: DIY builds save 15-20% compared to pre-built PCs with identical specs
- Customization: Choose exactly the components you want—no compromises
- Learning experience: Understanding your PC makes upgrades and troubleshooting easier
Pre-built options like Sawada Technology’s RM 1,899 to RM 3,999 systems work if you prefer plug-and-play with warranty coverage. But if you’re willing to spend a few hours learning, building yourself delivers better value.
Budget Tier 1: RM 2,000 Gaming PC (Entry Level)
Perfect for esports titles like Valorant, Mobile Legends, Fortnite, and CS2 at 1080p medium settings with 60+ FPS.
Component List
| Component | Recommendation | Price (RM) |
|---|---|---|
| CPU | AMD Ryzen 5 5500 (6-core) | 600 |
| GPU | Budget entry GPU | 700 |
| Motherboard | B450 micro-ATX | 250 |
| RAM | 16GB DDR4-3200 | 200 |
| Storage | 512GB NVMe SSD | 150 |
| PSU | 500W 80+ Bronze | 200 |
| Case | Budget mid-tower | 100 |
| Total | ~2,000 |
Performance: Expect 60-80 FPS in esports titles at 1080p medium settings. AAA games like Cyberpunk 2077 will run at lower settings with 30-45 FPS.
Budget Tier 2: RM 3,000 Gaming PC (Recommended Sweet Spot)
This is the best value build for 2026—capable of 1080p/1440p high settings in modern AAA games at 60-100+ FPS. Perfect balance of price and performance for Malaysian gamers.
Full Component Breakdown
| Component | Recommendation | Price (RM) | Why This Choice |
|---|---|---|---|
| CPU | AMD Ryzen 5 7500F or 9600X | 850-900 | 6-core gaming powerhouse, strong frame rates |
| GPU | Intel Arc B570 10GB or RX 7600 | 900-1,100 | Best value under $200 USD, 1080p/1440p champion |
| Motherboard | ASRock B850M or Gigabyte B850 | 450 | PCIe 5.0 support, dual M.2 slots for upgrades |
| RAM | 32GB DDR5-6000 (2x16GB) | 350 | Future-proof capacity for multitasking |
| Storage | 1TB NVMe SSD (Gen4) | 250 | Fast game loading, Windows boot |
| PSU | 650W 80+ Bronze modular | 300 | Reliable headroom, cable management |
| Cooler | Thermalright Phantom Spirit 120SE | 150 | Excellent air cooling for Ryzen TDP |
| Case | Montech King 95 Pro | 200 | Good airflow, optional RGB, clean look |
| Total | ~3,000 |
Performance: 60-100+ FPS in Cyberpunk 2077, Call of Duty, Fortnite at 1080p high settings. 1440p capable with optimized settings. Handles streaming and multitasking with ease.
Budget Tier 3: RM 5,000 Gaming PC (Enthusiast)
For gamers who want 1440p/4K high-refresh gaming and future-proofing for 3-5 years.
Key Upgrades
- CPU: AMD Ryzen 7 9800X3D (~RM 1,500+) – 8-core gaming beast with 3D V-Cache
- GPU: NVIDIA RTX 5070 or AMD RX 9070 XT (~RM 2,000-2,500) – 1440p/4K powerhouse
- RAM: Upgrade to DDR5-7200 if motherboard supports
- Storage: 2TB NVMe SSD + 2TB HDD for game library
Performance: 100+ FPS at 1440p high/ultra settings. 4K gaming at 60+ FPS with DLSS/FSR. Ready for VR and content creation.
Step-by-Step PC Assembly Guide
Never built a PC before? Don’t worry—it’s easier than you think. Follow these 11 steps carefully.
Tools You’ll Need
- Phillips head screwdriver
- Anti-static wristband (optional but recommended – RM 10 from Shopee)
- Well-lit workspace
- Your motherboard manual
Assembly Steps
Step 1: Prepare your case
Remove side panels and install standoffs where your motherboard will mount. Check your case manual for the correct locations.
Step 2: Install the CPU
Open the CPU socket lever on your motherboard. Align the CPU’s golden triangle with the socket’s triangle marker. Gently drop the CPU in—never force it. Close the retention lever.
Step 3: Add RAM
Open the clips on RAM slots 2 and 4 (counting from the CPU). Align the RAM stick’s notch with the socket’s notch. Press down firmly until both clips click into place.
Step 4: Mount the M.2 SSD
Locate the M.2 slot on your motherboard. Insert the SSD at a 30-degree angle, then press down and secure with the tiny screw.
Step 5: Install the CPU cooler
Apply a pea-sized dot of thermal paste to the CPU center. Attach the cooler’s mounting bracket following the manual. Connect the fan cable to the CPU_FAN header on the motherboard.
Step 6: Place motherboard in case
Install the I/O shield first. Carefully lower the motherboard onto the standoffs, aligning all holes. Screw in all corners—don’t overtighten.
Step 7: Connect front panel cables
Attach power button, reset button, USB, and audio cables from the case to the motherboard headers. Check your motherboard manual for exact locations.
Step 8: Install the PSU
Mount the power supply in the case’s PSU bay (fan facing down if there’s a vent). Connect the 24-pin motherboard power and 8-pin CPU power cables.
Step 9: Install the GPU
Remove PCIe slot covers from the case. Insert the graphics card into the top PCIe x16 slot until it clicks. Screw the bracket to the case. Connect PCIe power cables from the PSU.
Step 10: Cable management
Route cables through the back panel. Tie them with zip ties or velcro straps for better airflow.
Step 11: First boot
Connect your monitor to the GPU (not motherboard). Plug in keyboard and power cable. Press the power button. Enter BIOS (press Del key) to verify all components are detected. Install Windows from a USB drive.
Pro tip: Test thermals after building. CPU and GPU should stay under 80°C during gaming. If temps are high, reapply thermal paste or check fan orientation.
Where to Buy PC Components in Malaysia
Here’s where to get the best prices and selection in Malaysia:
Online Stores
- PC Image (pcimage.com.my): Wide selection, competitive pricing, good warranty support
- Ideal Tech (idealtech.com.my): Custom builds available, fast QC, positive community reviews
- Shopee Malaysia: Price comparison heaven—filter by seller ratings and check for flash sales
- Lazada Malaysia: Similar to Shopee, watch for 11.11 and 12.12 mega sales
Physical Stores
- Low Yat Plaza, Kuala Lumpur: Malaysia’s tech hub—multiple vendors, price haggling possible
- Digital Mall, Petaling Jaya: Good alternative to Low Yat, parking easier
- Sawada Technology: Pre-built options if you prefer not to DIY
Shopping tip: Compare prices across at least 3 vendors. Component prices fluctuate weekly. Low Yat vendors may match online prices if you ask.
Common PC Building Mistakes to Avoid
1. Bottlenecking your system
Don’t pair a high-end GPU with a weak CPU (or vice versa). The RM 3,000 build above is balanced—upgrade CPU and GPU together for best results.
2. Buying a cheap PSU
Your PSU powers everything. A failing PSU can fry your components. Stick to 80+ Bronze rated units from Corsair, Thermaltake, or MSI. Never go below 500W for gaming builds.
3. Forgetting thermal paste
Most coolers come with pre-applied paste, but check first. If not, apply a pea-sized amount—more isn’t better.
4. Not checking compatibility
Use PCPartPicker or check vendor sites. Your motherboard chipset must support your CPU. DDR5 RAM won’t fit DDR4 slots. GPU must fit your case length.
5. Overspending on RGB and aesthetics
RGB fans and tempered glass look cool but add RM 200-500 to your build. Prioritize performance first, bling later.
Pre-Built vs DIY: Which Should You Choose?
Pre-Built Pros
- Full system warranty (usually 1-3 years)
- Plug-and-play—arrives ready to game
- No assembly stress or compatibility worries
- Ideal if you’re time-poor or non-technical
DIY Pros
- 15-20% cost savings for same performance
- Full control over every component
- Learning experience makes future upgrades easy
- Pride of building something yourself
Example: Sawada’s RM 3,999 pre-built (Ryzen 5 7500F, similar specs to our RM 3,000 DIY build) costs about RM 1,000 more. You’re paying for convenience and warranty. If that’s worth it to you, go pre-built. If you want maximum value and don’t mind learning, DIY wins.
Upgrade Path for Your Budget PC
Start with the RM 3,000 build and upgrade incrementally:
Year 1: You’re golden. Enjoy 1080p/1440p gaming.
Year 2: GPU upgrade (RM 1,500-2,000) if you want 4K or higher FPS.
Year 3: Add more storage (2TB HDD for RM 200) or faster SSD.
Year 4: CPU upgrade if bottlenecked (Ryzen 7 9800X3D or newer generation).
Year 5: Consider full rebuild—technology moves fast.
The beauty of PC gaming: you control the upgrade schedule. Console gamers wait 7 years for a new generation. You improve your system whenever your budget allows.
Frequently Asked Questions
Can I build a gaming PC for RM 2,000?
Yes, but expect 1080p medium settings and 60 FPS in esports titles. AAA games will require lowered settings. The RM 3,000 build offers much better value for the extra RM 1,000.
Is it hard to build a PC for beginners?
Not at all. Modern components use foolproof connectors—CPUs only fit one way, RAM slots have notches, and power cables are keyed. Follow our 11-step guide and take your time. Most first-time builders finish in 2-3 hours.
Where can I buy components in Malaysia?
Online: PC Image, Ideal Tech, Shopee, Lazada. Physical: Low Yat Plaza (KL), Digital Mall (PJ). Compare prices across at least 3 vendors before buying.
Should I buy pre-built or build myself?
DIY if you want 15-20% savings and enjoy learning. Pre-built if you value convenience and full-system warranty. Pre-builts from Sawada (RM 1,899-3,999) are decent but cost more than DIY equivalents.
What’s the best budget GPU in Malaysia 2026?
Intel Arc B570 10GB (RM 900-1,100) offers best value under RM 1,200. It beats older RTX 3060 equivalents and handles 1080p/1440p gaming excellently. AMD RX 7600 is another solid option in the same price range.
Last updated: March 2026. Component prices fluctuate—verify current pricing before purchasing.